Cart
0
I still remember the first time I baked Seed the Moment and realized, oh… this bread actually wants to work with me, not against me. I had flour on my elbows, a warm oven humming, and that quiet baker’s hope that never really goes away.
What came out was exactly what I dreamed of when I created this mix: grounded, nourishing, honest bread—no shortcuts, no nonsense, just wholesome ingredients doing their thing.
Below is the updated, final, foolproof way I bake Seed the Moment at home, with two baking methods you can choose from depending on your setup.
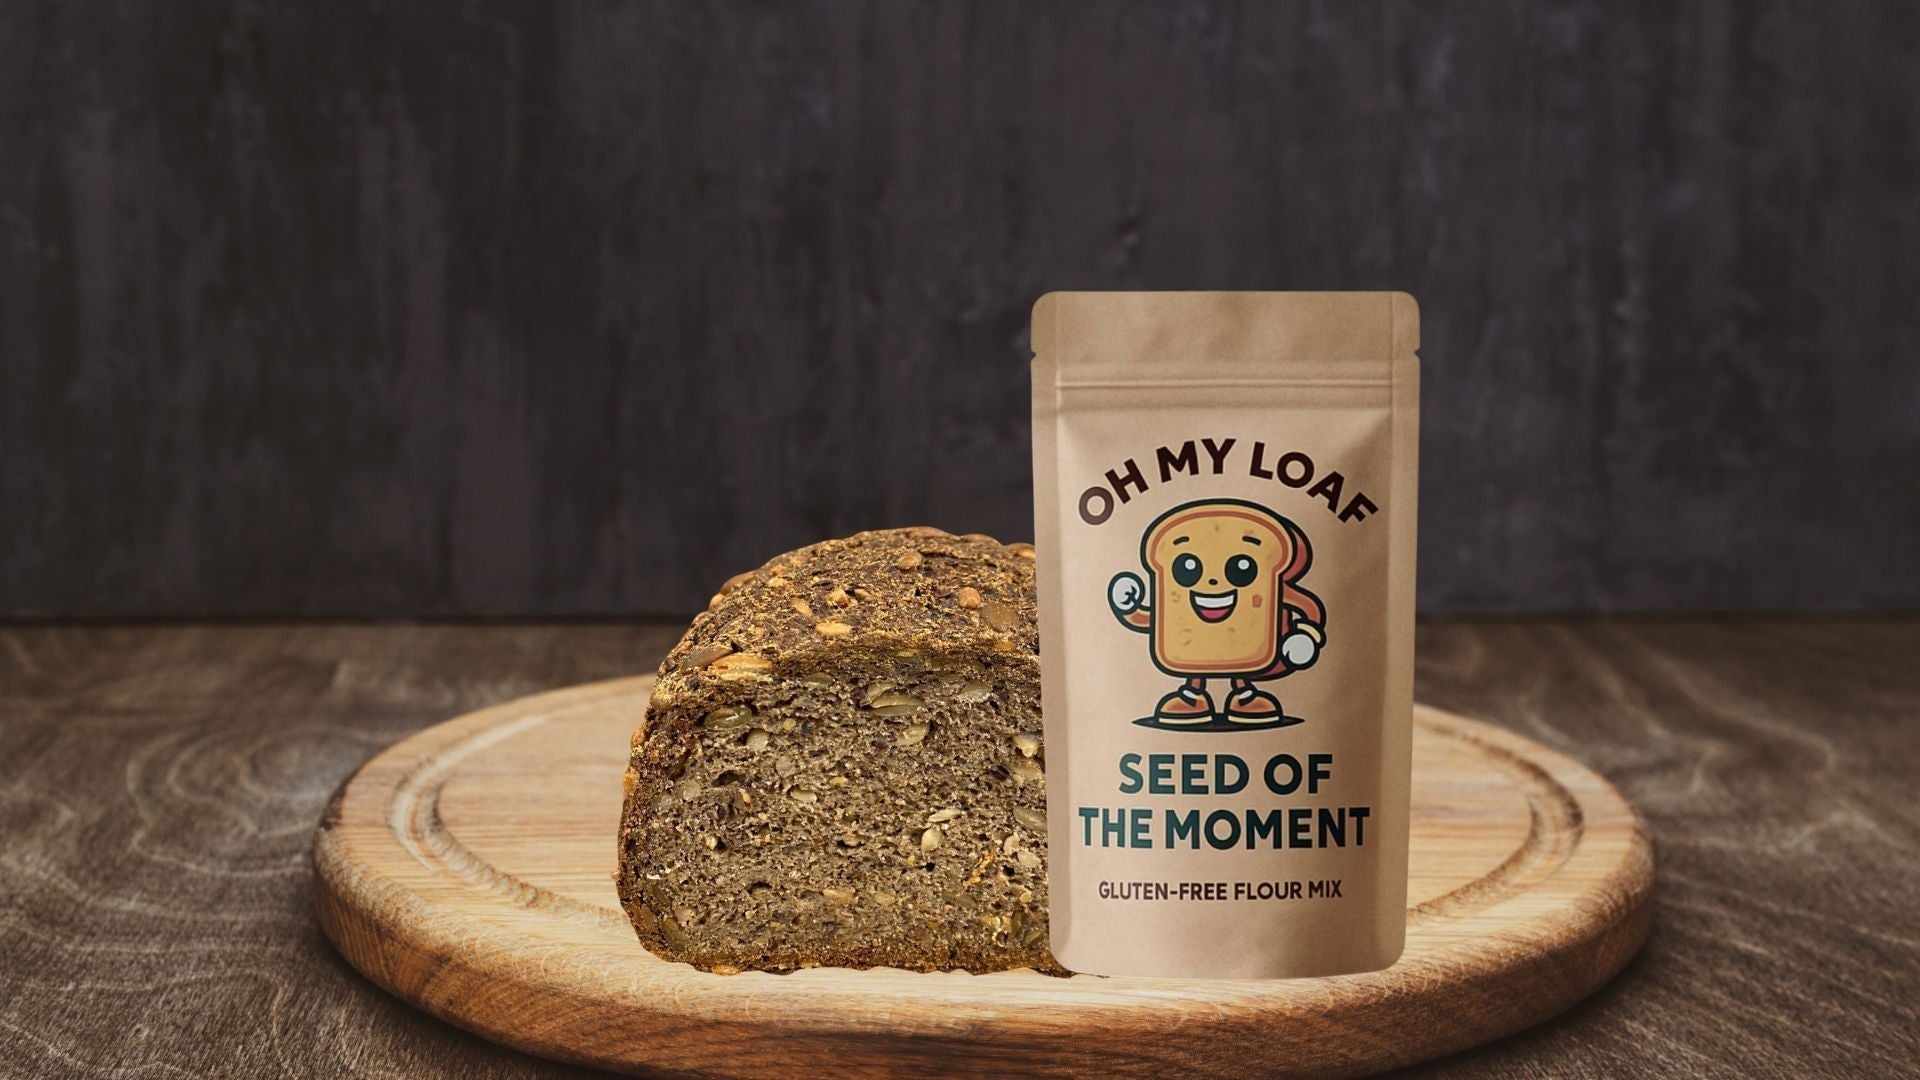
Seed the Moment
Baking Instructions (Two Proven Methods)
Seed the Moment is a naturally gluten-free, plant-based, seeded bread mix made for gluten-sensitive eaters who want real bread again—without yeast, kneading, or culinary gymnastics. It’s forgiving, flexible, and gets better with time.
What You’ll Need
-
1 bag Seed the Moment flour mixture
-
Filtered Water 500 g
-
One of the following:
-
-
Standard loaf pan 8"x 4."
-
Pullman loaf pan (the one we provide)
-
Oven-proof baking tray (for a free loaf)
-
-
Parchment paper (highly recommended)
-
-
A bowl, a spoon, and a little patience, some oil or oil spray to grease the pan or parchment paper.
Step-by-Step Instructions
1. Mix
Pour the entire bag of Seed the Moment into a bowl.
Add the 500g of water.
Stir until fully combined. The dough will be thick, a little sticky, and rustic—this is exactly how it should be.
2. Choose your baking style and shape before the rest or fermentation:
For Loaf Pan or Pullman Pan
Transfer the dough directly into your parchment paper-lined pan.
Tip: Grease the parchment paper
Smooth the top with a wet spatula or spoon.
For Free-Form Loaf (Baking Tray Method)
Line an oven-proof baking tray with a lightly greased parchment paper.
Using wet hands or a wet spatula, shape the dough into a compact oval or round loaf, about 2½–3 inches high.
👉 Tip from my kitchen:
A taller, tighter shape bakes better than a wide, flat one.
Once shaped, you’re done. After resting or fermenting, this loaf goes straight into the oven—no reshaping needed.
3. Rest or Ferment
Let the dough rest in the pan, uncovered or lightly covered.
-
Quick rest: 20–30 minutes
-
Fermented version:
-
8–12 hours at room temperature, or
-
Up to 48 hours in the refrigerator for deeper flavor and easier digestion
-
This step allows the psyllium, flax, and seeds to fully hydrate and create structure. The longer rest rewards you with better texture and taste.
Two Baking Methods (Choose Your Style)
Method 1: Steam-Assisted Baking (Oven Steam Method)
This method creates excellent oven spring and a beautiful crust.
-
Preheat oven to 425°F (220°C).
-
Place a heat-safe pan on the bottom rack with the bottom filled with water about 1/4" while preheating.
-
When ready to bake, place the loaf pan in the oven (middle rack).
-
Bake with steam for 20 minutes.
-
Slowly open the oven with your head turned away, allowing the steam to escape first, then carefully remove the steam pan and continue baking.
If the bread gets too brown, lower the temperature to 400°F (200°C) or slightly lower.
Total bake time: 90-100 minutes,
Method 2: Pullman Loaf Pan (Recommended & Provided by Us)
This is my favorite method—simple, consistent, and perfect for everyday baking.
(No steam required)
-
Preheat oven to 425°F (220°C).
-
Bake the loaf with the Pullman lid on for 45 minutes.
-
Remove the lid and continue baking for 45 minutes, allowing the top to set and brown.
This method traps moisture early, giving you a tender crumb without needing steam.
Total bake time:
90-100 minutes
If the bread gets too brown, lower the temperature to 400°F (200°C) or slightly lower.
Cooling (Please Don’t Skip This)
Remove the loaf from the pan and let it cool completely on a rack before slicing.
I know it smells amazing.
I also know slicing early is tempting.
But patience here makes all the difference.
Storage & Freezing
-
Store the wrapped whole loaf for 2-3 days on the countertop or in the refrigerator for up to 7 days
-
For longer storage, slice and freeze
-
Toast slices straight from frozen—no thawing required
Keeping the loaf whole in the fridge helps maintain moisture and texture.
A Final Word from My Kitchen
I created Seed the Moment for people who are gluten-sensitive, curious about fermentation, and tired of bread that promises everything and delivers disappointment.
This loaf isn’t trying to be fluffy white sandwich bread.
It’s trying to be honest, grounding, and nourishing.
Take your time with it. Let it rest. Let it ferment if you want.
And most of all—enjoy the process.
Happy baking,
Chef Frank 🌱
(still sweeping seeds off the counter)